Selectable card
A selectable card allows users to make selections by clicking anywhere within the card. It’s functionally equivalent to a form control, such as ToggleButton, RadioButton or Checkbox. You can group selectable cards to support single or multiple selection.


Use the selectable card pattern for options that:
- Are the main focus of your UI (and space permits).
- Benefit from an illustration or explanation.
- Should support quick interaction on mobile, with a large tap target.
Best practices
- Consider using other form controls, such as
Switch,RadioButton,CheckboxorDropdown, when you have insufficient space or many options that won’t be visible on screen at the same time. - Use
Cardinstead if your interactive elements are contained within the card content, such as a button or a link. - Use
LinkCardinstead to navigate users when clicking on the entire card.
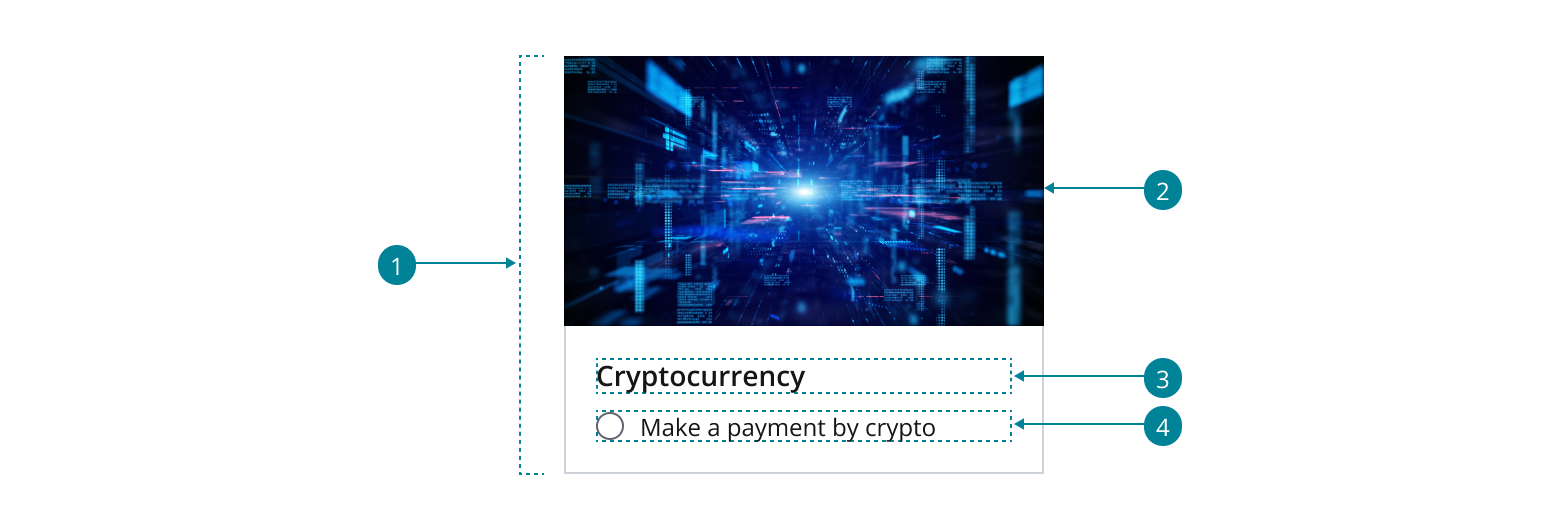
The following elements are used in a selectable card:
- Interactable card: The whole card is interactive and allows the user to make selections by clicking anywhere on the card.
- Image: Images are optional and should span the full width of the card. Refer to
Carddocumentation for more guidance on using images. - Title: The title can be accompanied by an optional icon or avatar.
- Selection indicator: Display a radio button (single-select) or checkbox (multi-select) within the card to clearly convey selection state. Supporting text may be included to help users decide.
- Use a stack layout to display the card’s content in a column.
- We recommend using radio buttons or checkboxes for single or multiple selection accordingly.
- Update the padding if you need a small or a large card. Refer to
Carddocumentation for more guidance on custom padding.

Best practices
- Be consistent in your use of images across all selectable cards within a group. Either all contain an image, or none do.
- Keep your cards' titles and descriptions succinct, using similar amounts of text in each card.
- By default, titles and supporting content are left aligned inside the card when using left-to-right languages like English. For text alignment alternatives, refer to the typography foundation.
Use radio buttons in selectable cards when your users need to make a single selection from a mutually exclusive set of options. Radio buttons ensure that users can only select one option at a time, preventing conflicting selections.

Use selectable cards with checkboxes when your users need to select multiple options from a list—checkboxes signal that multi-select is available.

Best practices
Selectable cards must include a non-color selection indicator for selected vs. unselected states. Don’t rely on border/stroke or color alone (e.g., in grayscale the selected card may be indistinguishable). Use a radio button (single-select) or check box (multi-select).
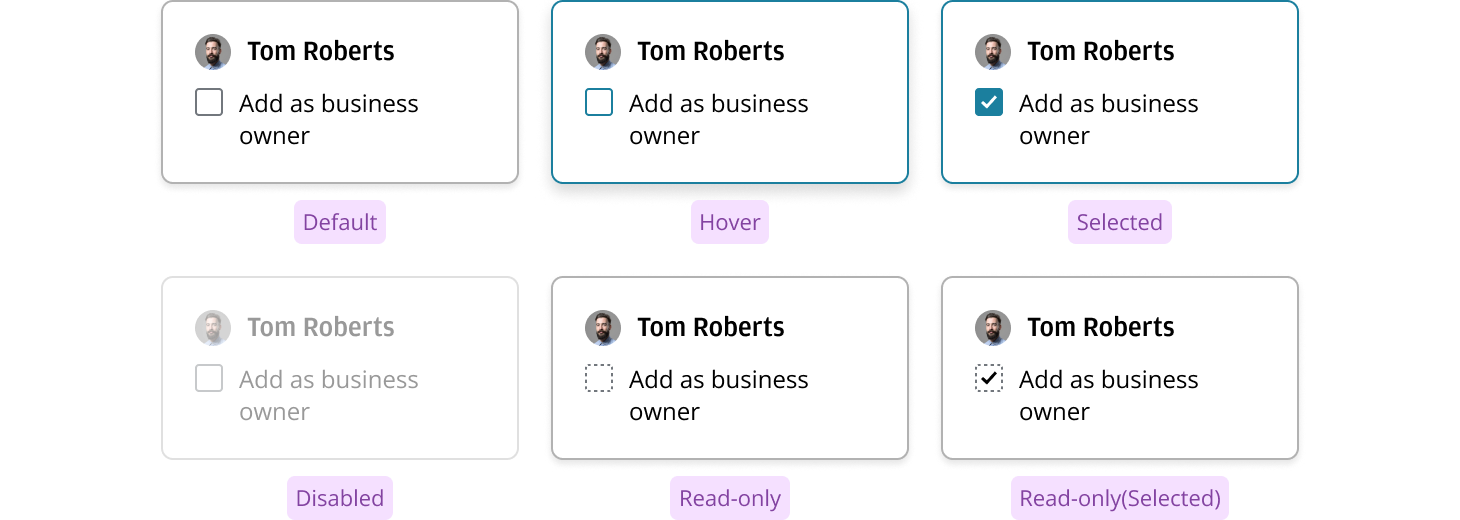
Selectable cards support the following states:
- Default: Available option; card and selection control are interactive but not selected.
- Hover: Pointer hover highlights the entire card to indicate it can be selected by clicking anywhere in the card.
- Selected: Option is chosen; selected styling and the selected radio/checkbox indicator are shown.
- Disabled: Option is unavailable; card and selection control are muted and not interactive.
- Read-only: Shown for review; selection state may be displayed, but the card/control cannot be changed.
- Read-only (selected): Shown for review with the option already selected. Selected styling and the selected indicator may be shown, but the card/control is not interactive and the selection cannot be changed.
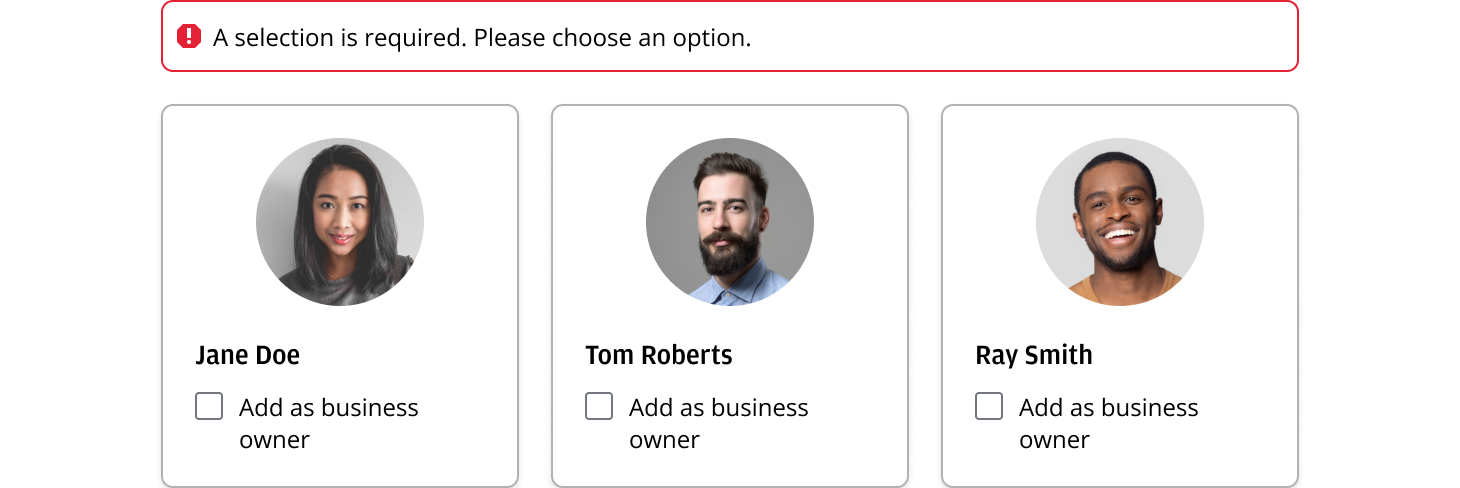
When at least one selection is required and the user attempts to proceed without a valid selection, display a Banner at the top of the selectable card set to provide immediate, in-context feedback. Show it after a validation event (e.g., Continue/Submit or other field validation), keep it visible until the user makes a valid selection, then remove it automatically.
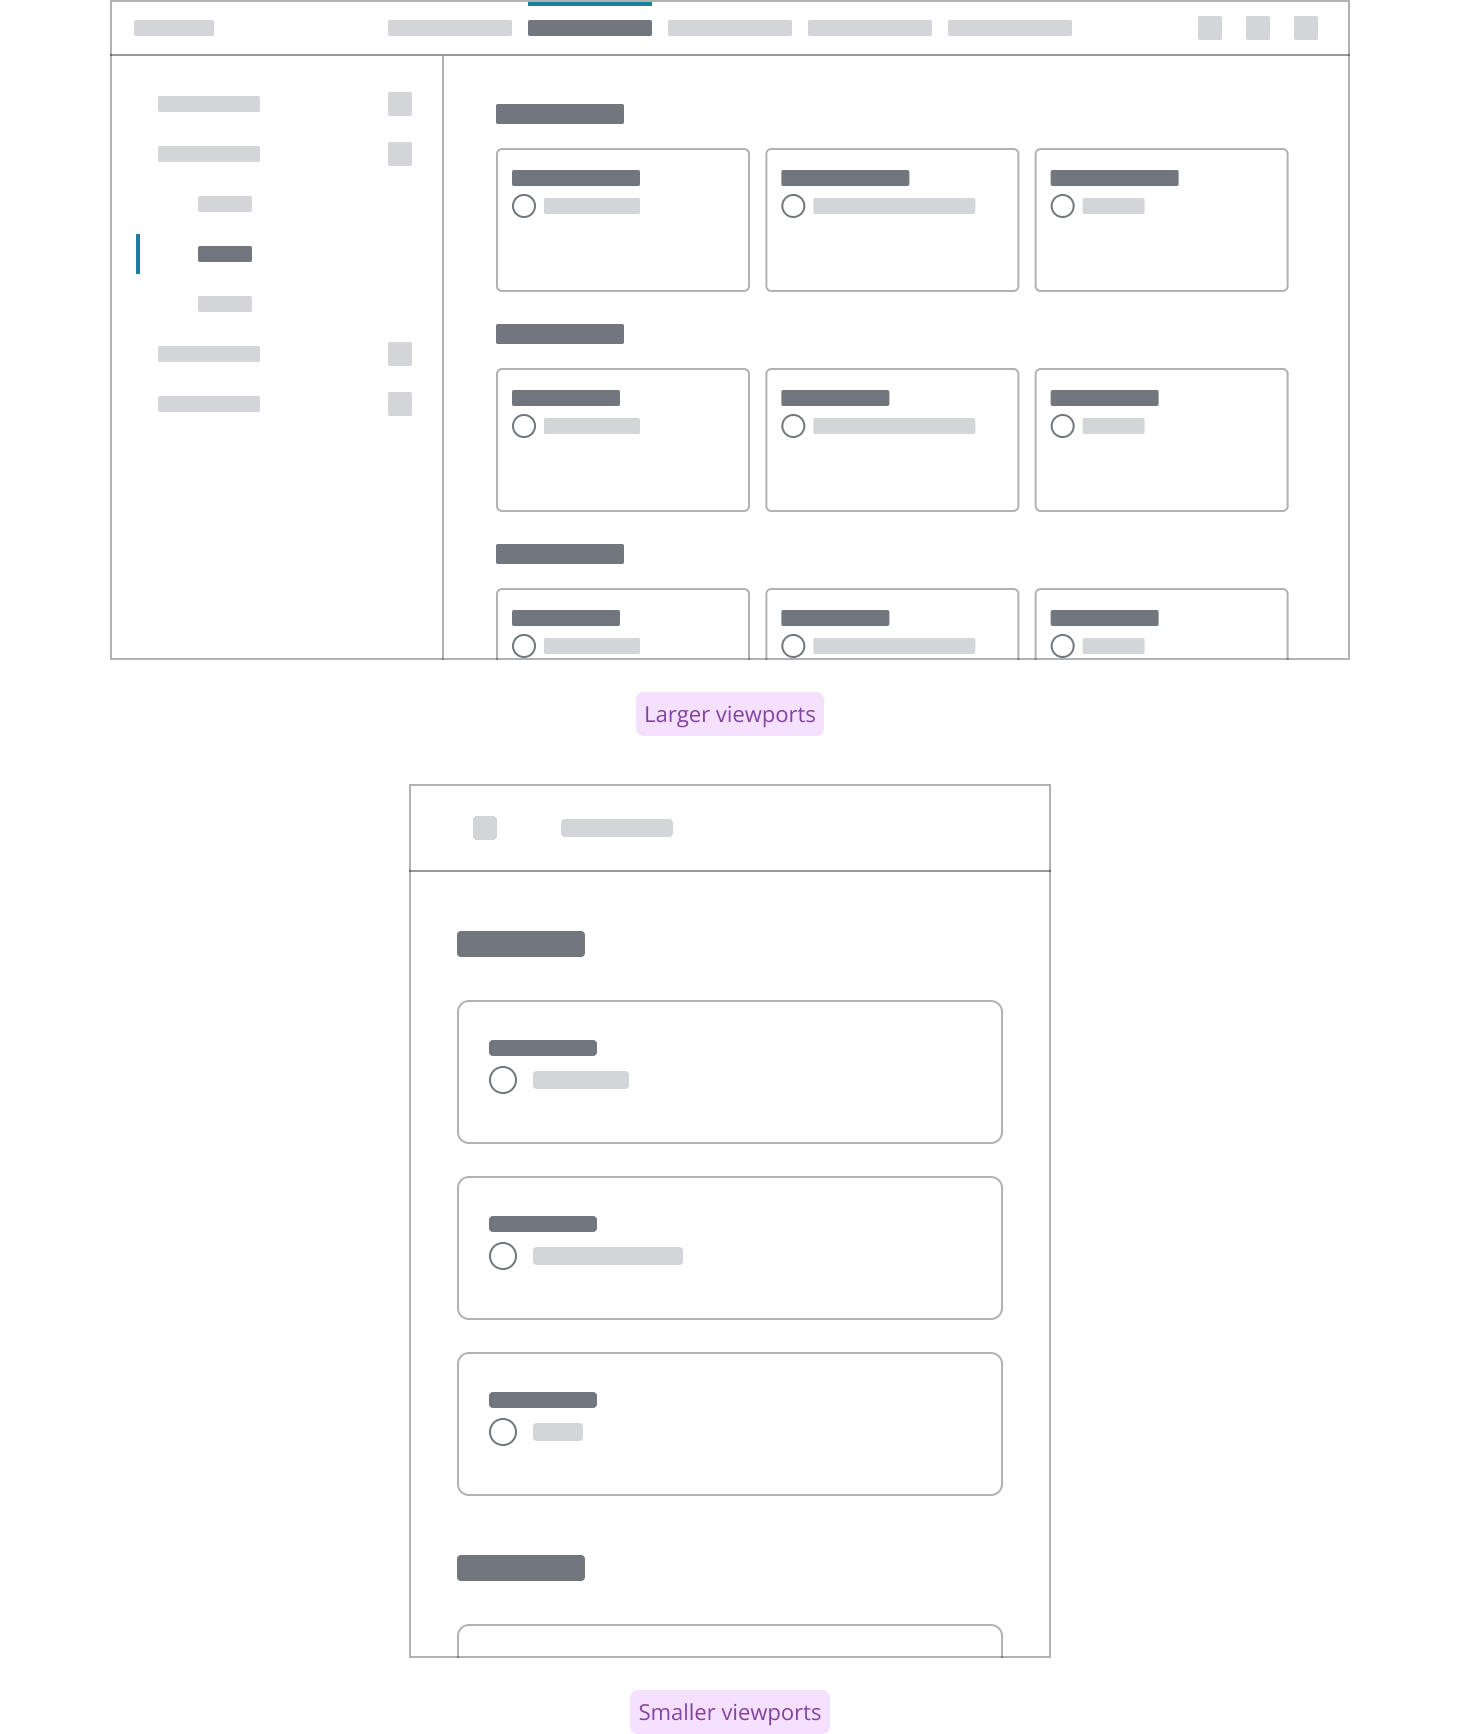
Adapt card layouts to the user’s screen size. For layout patterns, spacing, and page structure, refer to Salt’s Layouts guidance. On larger viewports, you can show more cards per row while keeping spacing comfortable for click/tap targets. On smaller viewports, show fewer cards per row (or switch to a single column). For breakpoints and responsive behavior, see Responsiveness.
Best practices
- Using a repetitive format or grid layout informs users of the selectability of cards, promoting understanding of their interactive functionality and improving accessibility.
- Keep cards in your group consistent in height, regardless of where they are positioned, to maintain uniformity.
- Use consistent horizontal and/or vertical spacing between cards to provide adequate touch/click targets, minimizing the risk of accidental taps or misclicks, while ensuring responsive layout across various viewports.
If you need to expand the pattern or share feedback with us, please contact the team.